
Electrical
This page deals with the pod lighting electrical requirements and other factors that needed to be worked out prior to purchasing the parts for the lights inside the pod.
LEDs
The pod will be lit with LEDs of various colours such as red, blue and white. LEDs are much better for models generally because they have a very long life (at least 10,000 hours) and do not stop working if the model should get bumped (every time I drop my Maglite, the bulb dies. It now has 3 LEDs in it and I can bang it around all I want). They also produce virtually no heat which can be mighty important in a plastic model.
Exactly how many LEDs are involved and their type comes from making near-final decisions about the type of interior that is to be used. For instance, the EVA Pod Working Group interior would require a few more white LEDs than the supplied interior. But at this point I am going to build the supplied interior and then decide if I want to build a revised one.
Below is a chart of my planned lighting of the stock interior.
| Area | # of LEDs | Color |
| Headlights | 4 | White |
| HAL Eye | 1 | Red |
| Front Consoles (there are 3 of these: front, left, right) |
3 | White |
| Back Consoles | 2 | White |
| Com Panel | 1* | Green |
Front Wall Consoles |
1* | Blue |
Red Fill Lights |
4** | Red |
* these areas will be lit with the assist of fiber optics.
** I will be using LED segments which are a one piece construction of approximately the correct size (see below)
So the reason for the extra planning here is that I need to work out how many volts and amps I need the AC adapter to be. I worked out that this many LEDs in these specific colours (different coloured LEDs have different power needs) requires around 600 milliamps. So I bought an 800 milliamp 6 volt adapter. That gives me a little extra power in case I want to add an overhead fill light near the door, or the newly discovered seat lights (see below).
Now that I know the amps and the chosen voltage (I could have used just about any voltage here but I like working at 6 volts) I can buy my leds, resistors and other parts related to the electronics.
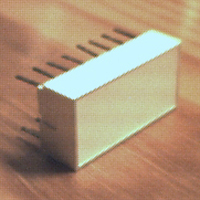
LED Segments (Light Bars)
 |
 |
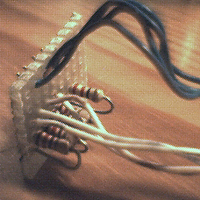 |
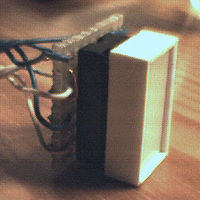
| An LED Light Bar or Segment. | Light bar assembly. I'll need four of these to light the pod. | Resistors (2 LEDs on each one) |
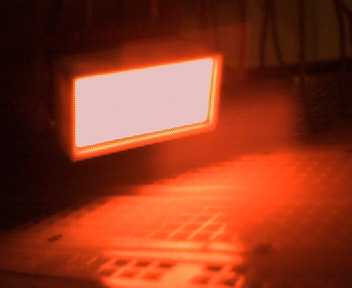 |
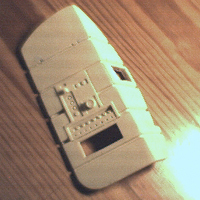
| Here is how the segment looks lit up. It's overloading my camera here but it is really a nice even ruby red colour and should fill the pod with the right amount of light. |
As I was looking at the Walker photo (see below), and the red light areas reminded me of LED segments. Segments or light bars are basically little bars (well duh!) with multiple LEDs inside. Here is a spec sheet of a similar type to the ones I am using. The ones I bought contain 8 red LEDs inside each bar and provide a fairly even red light across the surface. Plus they are just about bang-on to the size I wanted to make these lights. They are also not too bright and look quite good when running under the correct voltage.
 |
 |
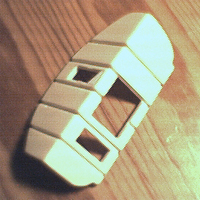
| The rear walls have been cut to allow the LED bars to sit at a slight angle pointing up. | |
Assembly wise, they will go into integrated circuit sockets which are in turn soldered to a small circuit board. All the soldering is done to the board and then the light bar is pushed into place on it's socket. This ensures that I don't fry them with too much heat. There are 8 little LEDs in there and if I toast one, the whole segment will look wrong and it's useless.
The other end of those wires has an identical circuit board that carries the resistors (I'm using 2 LEDs on each resistor - works just fine). This one is going on the left or right back walls. The front light assemblies will probably be the same if there is room to do that. If not, I'll have to wire them much differently. By the way, I'm using 24 gauge wire stripped from some Category 5e cable I have left over from redoing the phones in my old house.
The rear wall panels have had their holes made for the LED bars. I've also cut out the left wall panel so I can put in the lightbox for the back-lit switches. I did this by drilling holes in the corners of the openings and then cut out the bulk with a jewelers saw and a very fine blade. A little wet sanding with a sanding stick cleaned them up nice and square.
The Hidden Seat Lights
 After examining the Walker Photo, I noticed that a square white-lit switch is seen on the right (and probably left) of the seat approximately where the seatbelts may be. As far as I can tell these lights do not appear anywhere in the film. But I think they may look pretty cool when peeking in at Dave from the open door, so I may add additional LEDs to both sides of the seat for these.
I made a large version of this photo that I've cleaned up. It's about 1.5 megs in size and available here.